Introduction
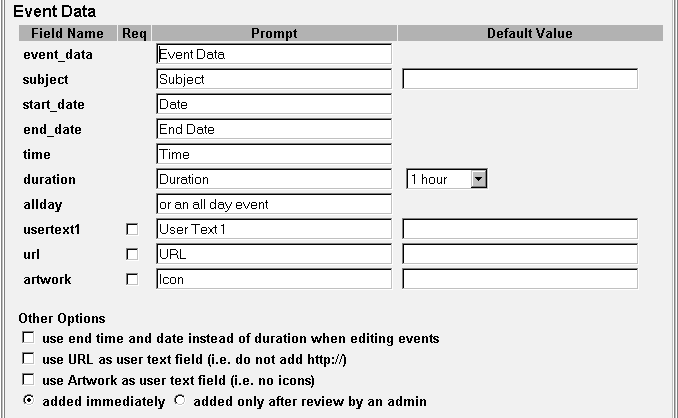
The event database contains as many 40 fields. Each field may be customized by renaming them, changing its default value, changing its prompt (or exposed name) and changing its required status.
To effect these changes you may use the Customize Event Database screen. This help page documents that screen.
The changes you make in this screen apply only to the current calendar. You may copy the file eventedit.dat from the current calendar's folder to each of your other calendars to make these changes apply to all calendars.
- Note: The following information applies to the To Do
List and Contact List databases as well. To customize these items however
you must hand edit their corresponding todoedit.dat
and contactedit.dat files by hand.
Customizing Databases
The introduction to this screen provides a brief description of what it is used for and a link to reset these values back to their default values.

There are four columns in this screen:
- Field Name
- Required
- Prompt
- Default Value
The Field Name column contains the name of an event's field as it is known internally to the program. You may not change this column.
The Req column contains checkboxes for some fields that may be made 'required'. A required field must be completed by the end user adding the event.
The Prompt column is the name of the field as it appears to the end user wherever the event is displayed. For example, the internal field subject is known as subject internally -- however you may wish to call it 'Topic'. To do this you would set this field's Prompt to 'Topic'.
The Default Value (which is presented only for values for which it is appropriate) allows you to enter a value that will appear in all newly created events. You might wish to use this to set the default value for the event's contact information for example.
You may use Replacement Strings in these Default Value fields. Here is a list of applicable replacement strings:
      [{USER_NAME}]:   the name of the currently logged in user
      [{USER_EMAIL}]:  the email of the currently logged in user
      [{USER_PHONE}]:  the phone of the currently logged in user
      [{USER_FAX}]:    the fax of the currently logged in user
      [{USER_USERID}]: the userid of the currently logged in user
By using Replacement Strings you may have certain data entered in each new event without the user having to enter it. For example, if you enabled the User Text 1 field and called it Meeting Organizer you could enter [{USER_NAME}] in as the default value for that field. Each time someone entered a meeting their name would be filled into this field automatically.
Hiding Fields
Any field in the database can be hidden by entering a blank or empty Prompt. The field's Default Value will be still be set in the event (even though you cannot edit it - for example you could set the default text and background colors and then hide these controls to make sure all events look the same).
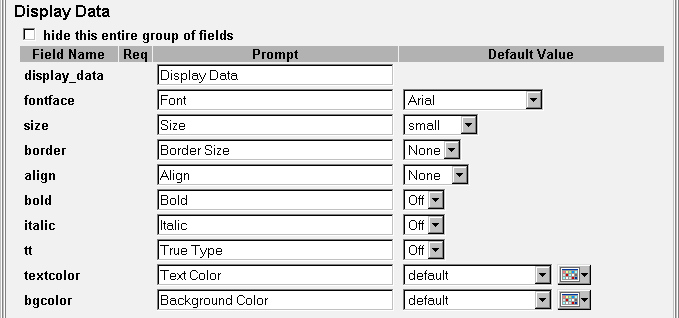
You may hide entire groups of fields by checking the 'hide this entire group of fields' check box above that group.
Specifics about this screen
Most of the items on this screen is self-explanatory if you've read the above help text. Only items in need of specific mention are described in more detail below.
Event Data Section

Use end time and date instead of duration when editing events: Check this item if you would like to specify an event's end time explicitly (as opposed to implicitly by using duration). If this item is checked the Event Edit screen will show Start Time and End Time editors instead of Start Time and Duration editors.
Use URL as user text field: The URL field is automatically displayed as an HTML hotlink. If this item is checked then the URL field (which you may rename) is treated just as if it were any other text field such as User Text 1 or 2.
Use Artwork as user text field: The Artwork field usually is automatically treated as a reference to an image in the ./calweb/cw_icons folder. If this item is checked then the Artwork field (which you may rename) is treated just as if it were any other text field such as User Text 1 or 2.
Added immediately / Added only after review...: This important field turns on and off the Pending Event feature. If ...only after review is checked then whenever users add events to the calendar the event will be added but only in a pending state. Pending events only appear to ADMIN or higher users (they are clearly denoted as pending). An ADMIN user can review the event and either accept or reject it.
User Text 1: This field can be used for any purpose. It is hidden (its prompt is empty) by default.
Drop Down Groupings Section

new vals: If this item is not empty then additional edit boxes appear after each drop down item (Category, Location, etc) that will allow end users to add new values to the drop down. The next time the Event Edit screen appears the new value will be part of the drop down box.
Note: You may specify the coloring associated with a particular Category, Location or Priority in the Drop Down Manager screen.
Collaboration Data Section

Notifications: The Notifications field has no effect (and will not appear on the Event Edit screen) unless you have properly set the values in the Email Settings screen.
noteorder: By default, when a user attaches a note to an event, the new note is pre-pended (or added at the beginning) of the note display. If you would rather each new note to be added to the end of the note display change this value to Chronological.
Contact Data Section

Note: Please see the above discussion about Replacement Strings for a powerful way to customize these fields (and any other field on this screen for that matter).
Repeat Data Section

You may use this section to customize the repeat data section of the event database. You may also use this section to hide various portions or all of this section.
Note: It is not possible to modify the values displayed in the repeat data section of this form.
Display Data Section

You may use this section to customize the display data section of the event database. You may also use this section to hide various portions or all of this section.
Note: It is not possible to modify the values displayed in the display data section of this form.
Other Items

display_source: This value allows you to specify that the display values used by any event are taken from the values set on the Drop Down Manager. You may choose to pick up the display data from any of the Category, Location, Priority, UserText1, or UserText2 drop down fields. For example, you can make all Birthdays green and all Doctors Appointments purple. By default the event display data is taken from the event itself.
The remainder of this section controls the display of the Report View calendars.
Field list: Specify the internal field names in the order you would like the Report View columns to appear. Separate the fields with commas.
Alternate colors: You may specify that each report row uses an alternating color (making it easier to distinguish the rows).
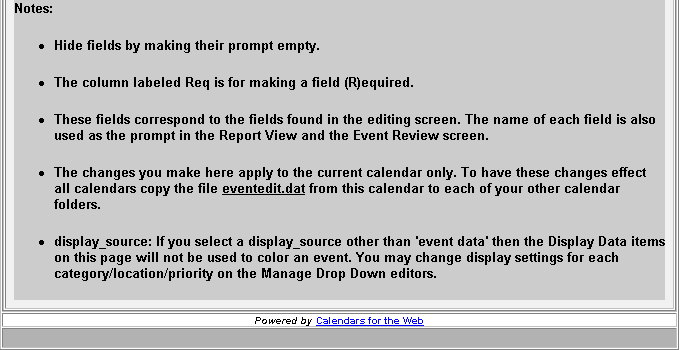
Notes Section

Please read the notes in the remainder of this screen for more information